
The Secret Way to Animate Figma Designs
February 10, 2023
Words by Michael Fordham
Did you know that you can animate Figma designs in just a few clicks—without coding anything?
Figma is a dream for quickly creating static designs and prototypes, but it can feel a bit lacking when you want to develop concepts involving complex animation. It can be extremely difficult to communicate transitions to developers using a flat prototype and ensure clients understand your ideas when your designs have to be described, rather than experienced.
As a no-code web creation platform that loves using Figma for our own projects, we decided to build our own shortcut. Our Figma plugin lets you easily transform static Figma files into fully animated web designs in just a few clicks. The best part is that no code is required to animate your Figma designs. Let’s take a closer look at how it all works.


Why Should You Animate Figma Designs?
Animated designs are far more compelling than static ones — both as a conceptual and communication tool. From a web experience perspective, they can seriously improve user engagement, rewarding people that continue to move through your website. If you are designing an animated concept for a client, presenting a living, breathing prototype lends instant wow-factor to your pitch and can save you precious time on multiple rounds of review.
Using no-code tools to animate Figma designs means you can quickly create complex animations which would otherwise take a lot of time, money, and dev resource to code by hand. They also allow designers to enjoy complete creative control, so they can own the design process from concept to execution without any handoffs.
Step-by-Step: Animate Figma Designs
An easy shortcut to animating Figma designs has long been a dream for many designers, so we’re letting you in on the secret. Follow this step-by-step tutorial to learn how to create a single-page website with hover animations by importing a Figma design into Vev.
Step 1: Create Your Figma Design
For this design, we’re going to experiment with something very “of-the-moment”: AI. Is AI website design the future? Maybe, maybe not… but this is just a bit of fun to prove to you how easy it is to animate Figma designs.
As we are creating a design for a single-page website that displays different examples of AI art, along with some prompts used to generate them, we need to first generate some AI art for our design. For this, we have used DALL-E, a product of OpenAI. You can create a limited number of generations for free, or download some of their sample art from the website.
Once we’ve placed our generated images into Figma, we can begin work on the layout. When importing your design into Vev, the most effective thing to do is split sections into different artboards, and then include them in one single artboard when you’re satisfied that the section is complete. This allows Vev to properly translate your design into a coded site.
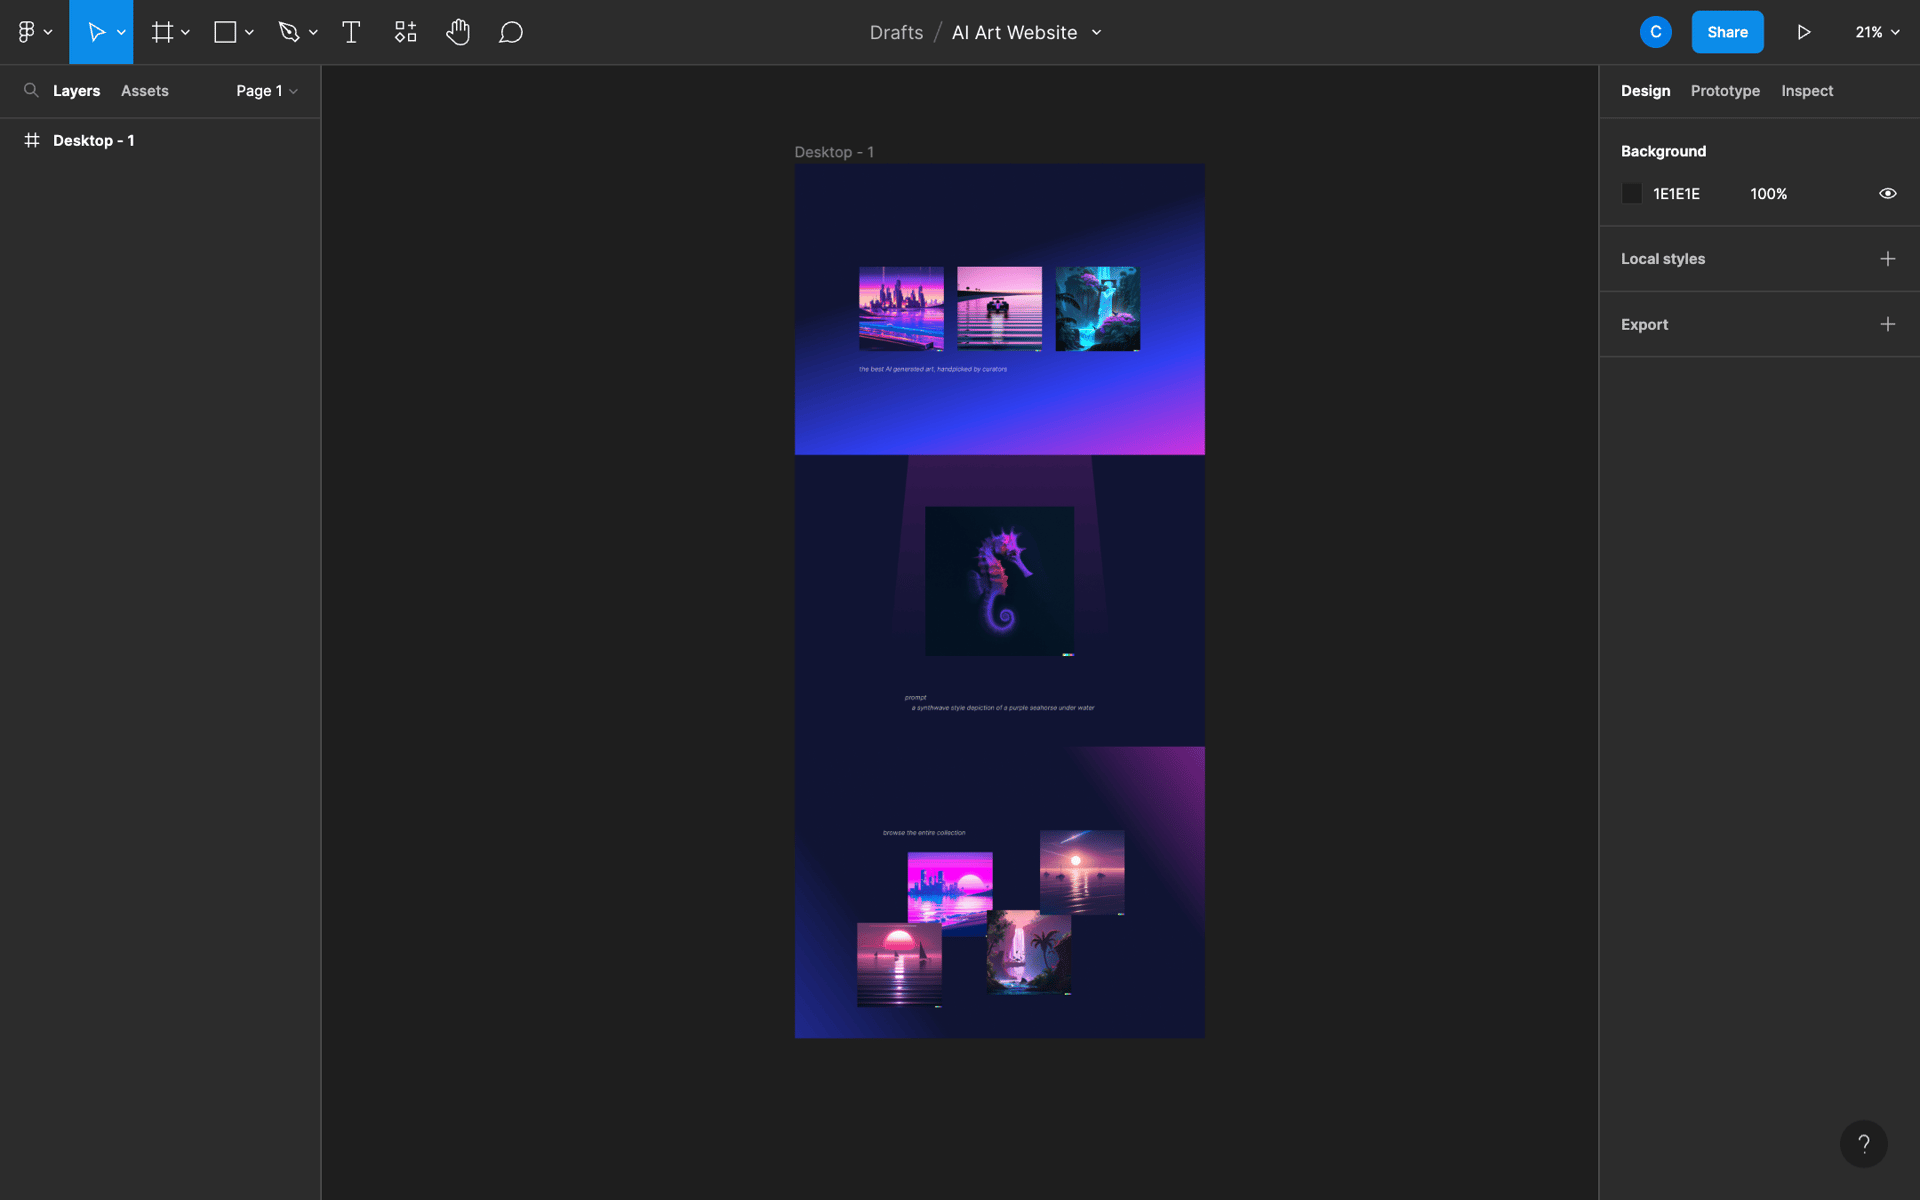
As you can see, we have three sections, each with different styles. At the moment, all of these designs are static with no animations. We’ll add the animations in Vev.
Here’s a link to duplicate the Figma design if you want to follow along with this tutorial.
Step 2: Import Your Design into Vev
Once you are satisfied with your design, use the Vev plugin to import it into Vev. This process transforms your design into quality semantic HTML, CSS, and Javascript in Vev, so you can quickly animate your Figma design and get it ready for publishing.
To use the plugin, select your main artboard and then run the plugin. You’ll see a dialog open which confirms the assets Vev will be importing, along with an input for you to add your Figma file URL.
Once you’ve pasted the link, your browser will open a new tab showing the imported project in Vev. Now it’s time to animate!
Step 3: Quickly Animate Figma Designs in Vev
Starting with the first section of our example design, we currently have three pieces of art on show. It feels quite lifeless at the moment, so we’re going to introduce some interactivity with some hover animations.
Add a Hover Rotation Animation
We’ll select the first image, click the “Addons” menu in the top right, and select the “Animation” addon. From here we’ll choose a “Hover animation” so that our desired effect will be triggered when a cursor hovers over our image. For the actual effect, let’s apply scale and rotation animation, so that the image increases in size and gently rotates.
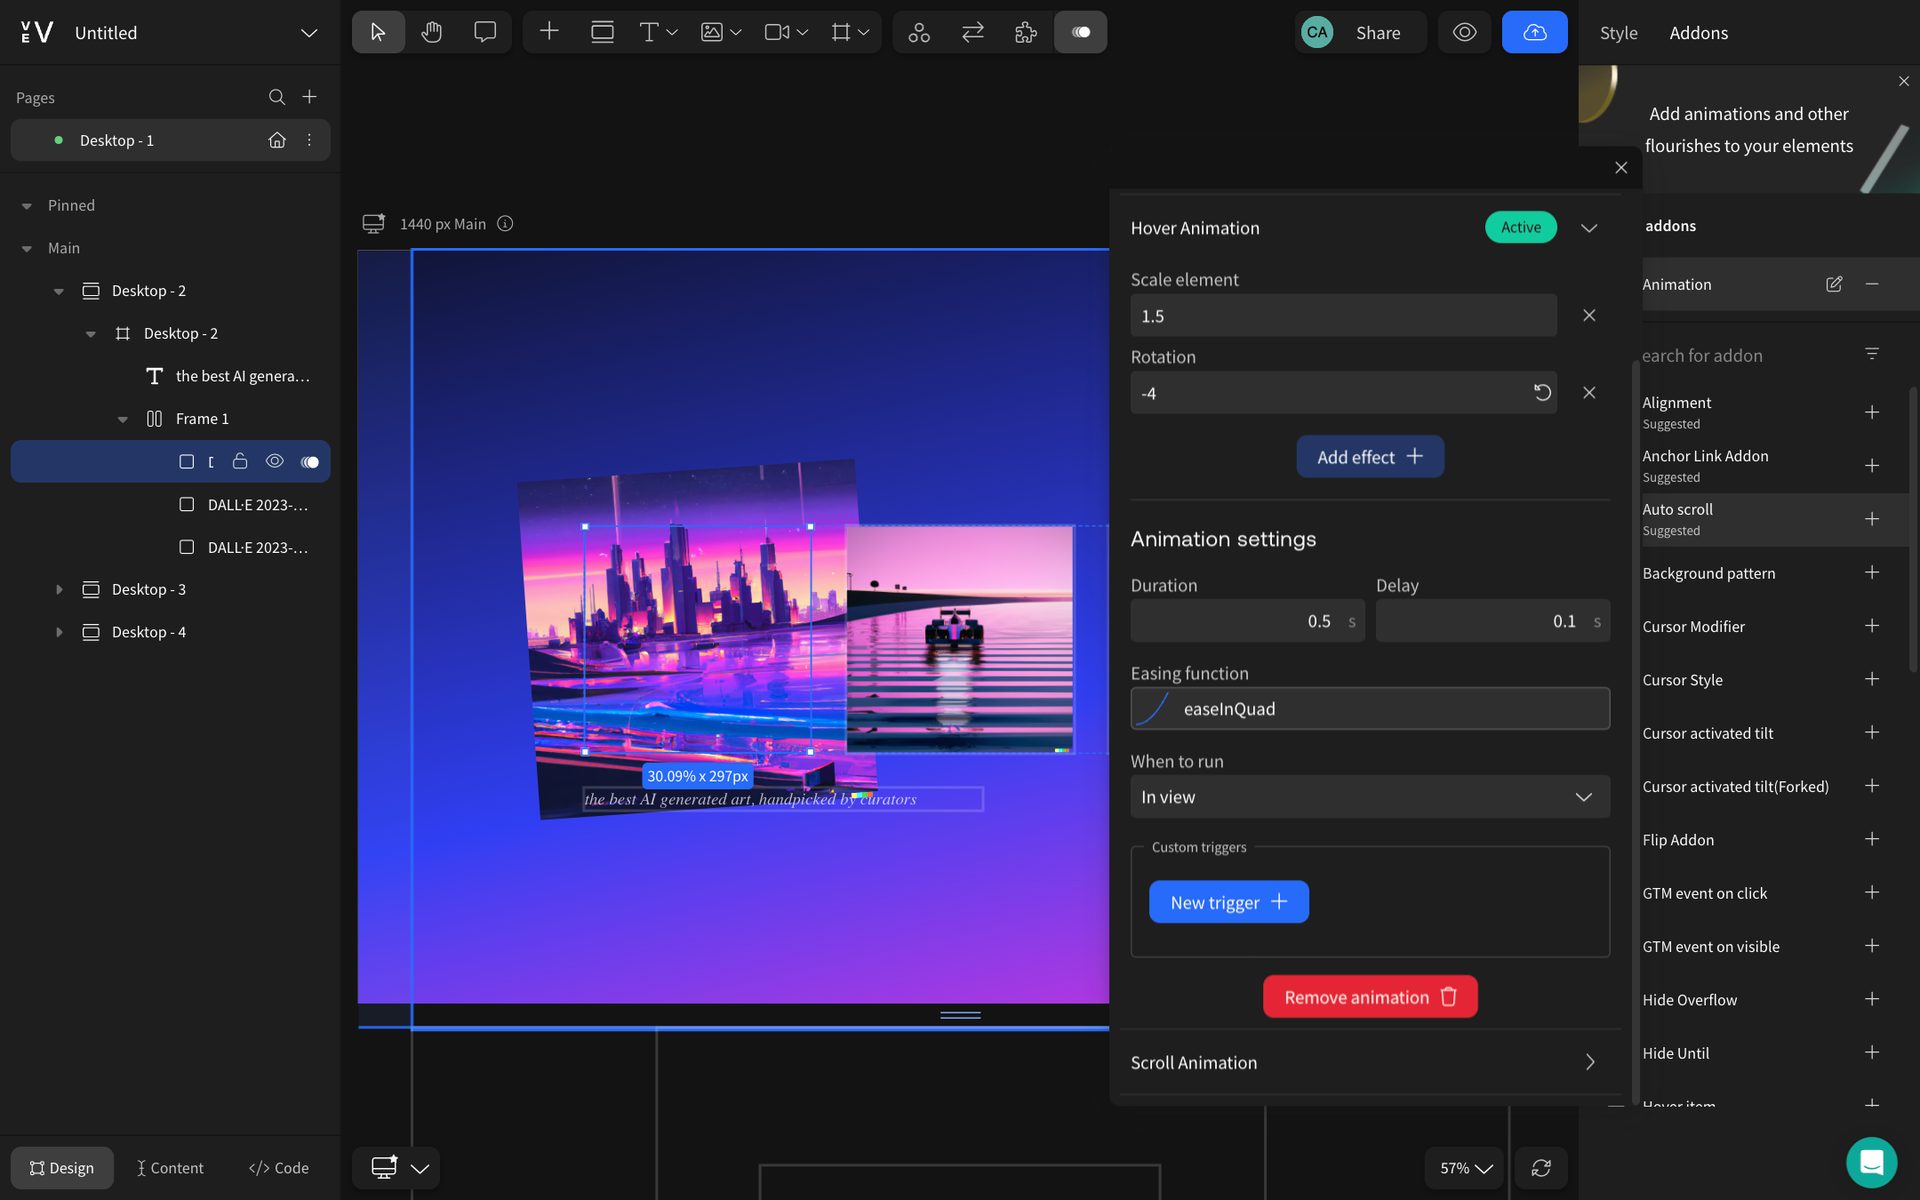
In this example, we’ve scaled the element by 1.5 of its original size, and rotated it very slightly to give the feeling we’re muddling through printed artwork on a cluttered desk. In Vev, these animation addons are pre-built, but also fully customizable. Here, you can set the duration and delays of the animation to make the interaction clearly visible when a user hovers.
You could make a preset of this animation and apply it to the other two pieces of art on the page. However, we want to add some variation, so we’ll give them slightly different scale and rotation values.
Add a Scroll Opacity Animation
Moving onto our next section, we have another piece of art which is designed to look like it’s under a spotlight.
Here we’ll apply a couple of different animations:
- We’ll make the spotlight appear to “turn on” as a user scrolls into the section.
- We’ll make the artwork move with the user’s cursor as they move about the section.
Let’s start with the spotlight.
We’ll select the background gradient image and apply a scroll animation to adjust its opacity. This will make the spotlight beam seem to brighten as we scroll into the section.
Add a Cursor Parallax Animation
Moving our attention to the artwork, as something that we want to feature prominently, let’s add a unique and interesting interaction to it. Luckily, Vev comes loaded with a selection of pre-built interactions. These would be time consuming to code yourself, so we’ve done the hard work for you. Let’sl select the artwork and apply the “Mouse Move Parallax” addon.
Here, you can enter a value for the movement factor. Lower values result in less movement, while higher values mean the element moves rapidly in response to a cursor’s placement. You can also either have the element move towards or against the cursor. To help the user to feel close to our art, let’s uncheck the “move against cursor” option so that the element moves towards the cursor as the user scrolls around the page.
Here you can see the artwork moving towards the cursor as it moves in different directions around it. Hopefully by now you are seeing how much fun it can be to animate Figma designs, and how easy it is when you’re not having to write a line of code!
Add a Skewed Hover Animation
Moving onto the final section of our example, we have a collection of four pieces of art which are all stacked over each other. Ideally, we want the user to be able to see them in more detail as they hover over them. With an element selected, we can add an animation addon and get it to run on hover as we did in the first section.
To create the skewed effect, we’ll make the element scale and change its horizontal position on hover. You can create a shared preset to avoid remaking these animations for each element. All you have to do is click the plus icon at the top of the animation controls to create and name your new preset. Then just select that preset from the dropdown list for your other elements.
Now that all of those elements have the same animation addon, we have taken it a step further with our isometric addon. This lets you animate an element into an isometric view. For each element, add the isometric addon and select the option to animate it on hover. You can customize the values to fit your design. In our example, we have changed the values for some of the axes on the other elements so they animate in a different direction.
This is such an engaging way to show off your content, and it only takes a few clicks in the Vev design editor to achieve.
Step 4: Adjust Your Design Across Devices
To finish off your design and make it truly publication-ready, you can make it responsive by using the breakpoint selector in the bottom-left and moving elements around the canvas so they still look great on the smaller screen sizes of tablet and mobile.
And that’s it! A quick and easy way to animate Figma designs and turn them into interactive experiences full of sophisticated animations. From here, you can publish your animated Figma design anywhere on the web — either by just embedding it into a project within your existing CMS, or hosting it through Vev.
Interested in seeing how it ended up? Check out the final published site.
Animate Figma Designs With No-Code
Discover the secret way to animate your Figma designs. The Vev Plugin takes care of all layout, alignment, styles, and auto-layout components — so you can just focus on adding stunning animations to your web designs. Easily add interactivity and publish your site anywhere on the web when you’re ready.
Want More Inspo?
Get our monthly newsletter straight to your inbox.
You can always unsubscribe at any time.
Privacy Policy