
Prototyping in Figma to Live Site: The Vev Shortcut
January 24, 2023
Words by Michael Fordham
Looking for a shortcut between prototyping in Figma and publishing on the web? We have you covered.
Designing for the web can be a little repetitive. Typically, after you’ve done all your research and are satisfied you know what to build, you’ll hop into a design tool like Figma, Sketch, or Adobe XD and design a high-fidelity, pixel-perfect interface. Then, you’ll either pass your designs on to developers—who might not implement your vision exactly as you saw it—or you’ll have to completely recreate the design again in another tool, wasting time, effort, and money.
Yet, designers don't have to keep working like this. There are now no-code tools like Vev available which can take your pixel-perfect Figma prototype and turn it into a coded, publication-ready website in just a few clicks.
Our plugin provides a super-speedy creative shortcut to get your Figma design animated and interactive, and ready for clients (or the whole world) to see — without involving a developer or rebuilding it from scratch.
This tutorial article takes you through how to:
- Import a Figma design into Vev
- Make the design responsive and interactive with animations
- Export the Vev site so it can be published
Let’s jump in and create a living, breathing piece of digital content without having to write a line of code!


Prototyping in Figma
If you are following this tutorial, you will most likely already be using Figma to a reasonable level. However, if you find yourself getting lost at any point, check out Figma’s learning resources to get up to speed on using Figma for prototyping.
We've built a Figma prototype to show you the ropes. To follow along with us step-by-step, feel free to duplicate it into your Figma account! Here are the key things to keep in mind when prototyping in Figma:
Dimensions
One of the most important things to keep in mind when prototyping in Figma is to select the "Desktop" option (W1440 x H1024), because you will be importing your design as a desktop website.
Frames
We’ve made up a brand called Sprout, and created the landing page which is going to generate some hype for the brand’s launch. For each section of our landing page, we have used a frame inside our main desktop frame. This will help when we import the design into Vev later.
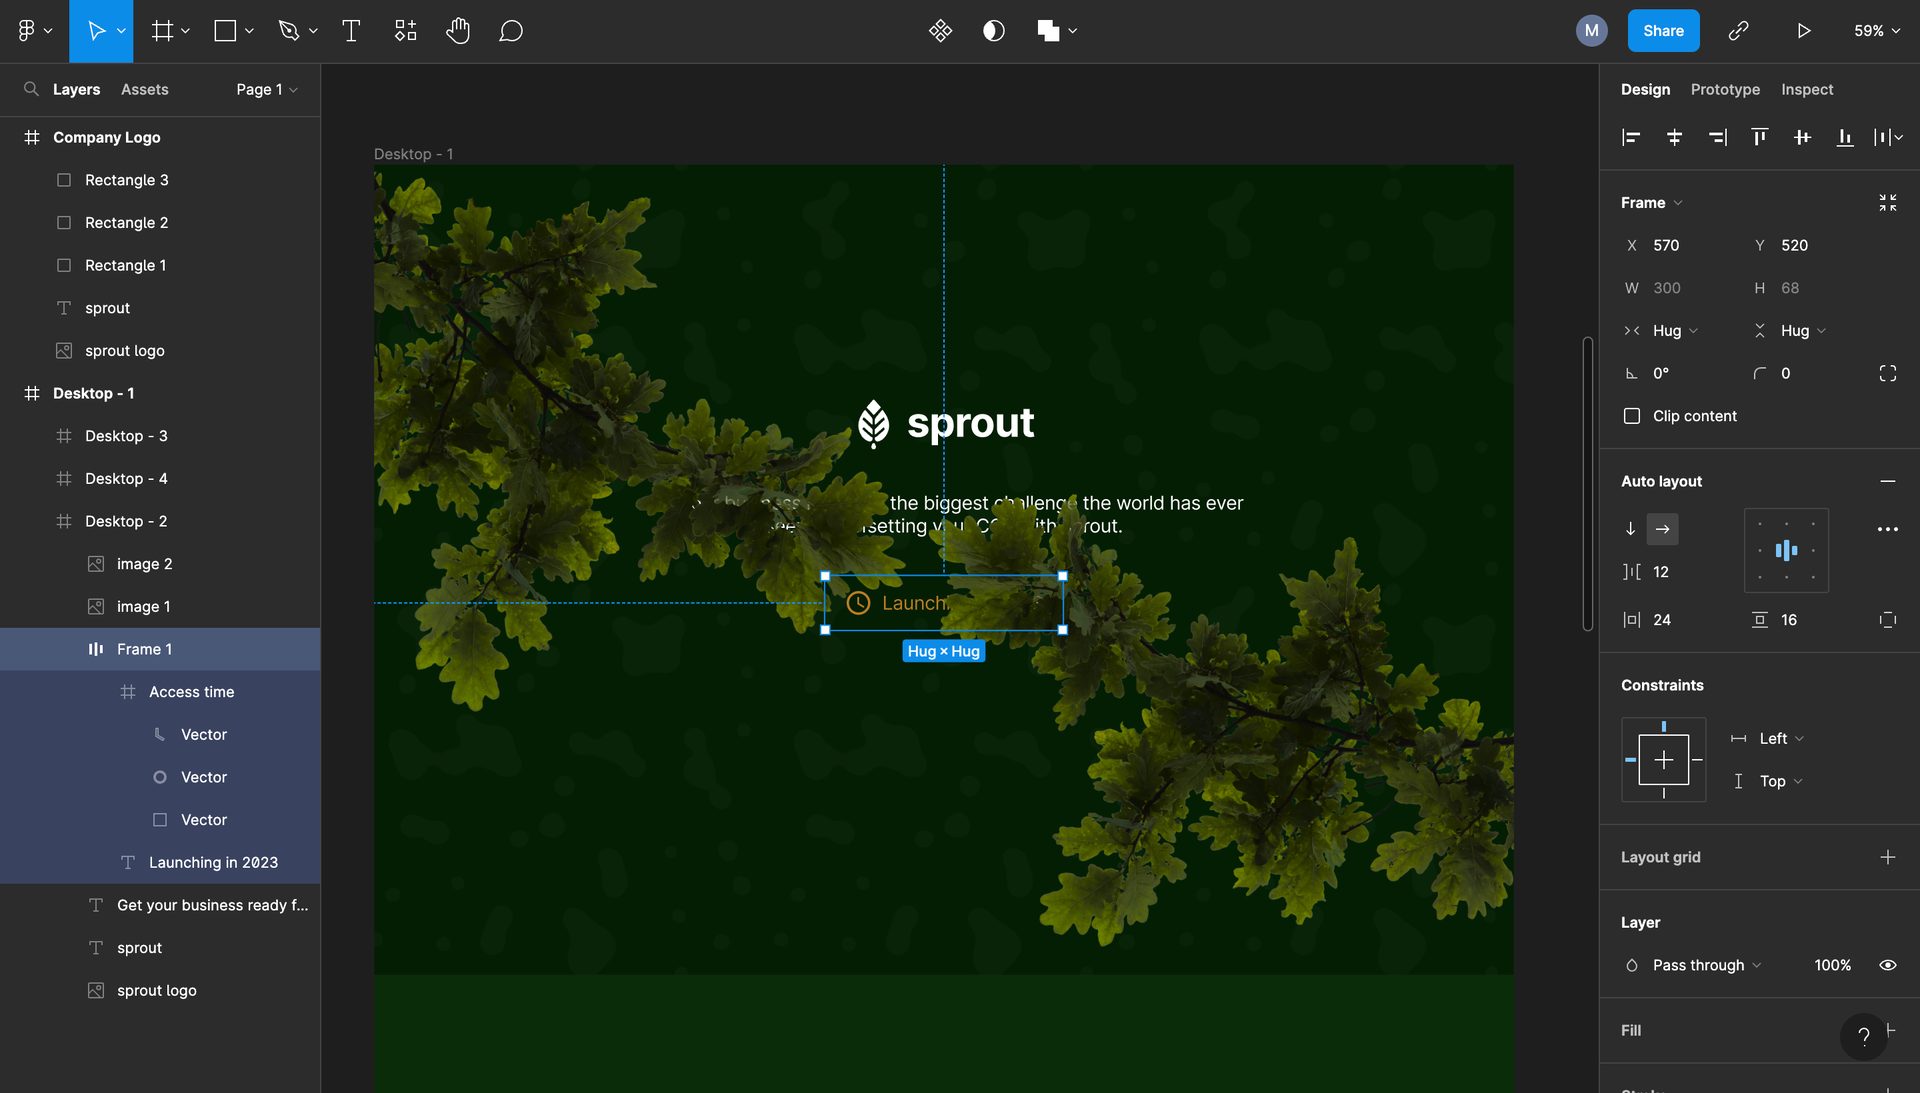
Auto-layout
We have also used auto-layout when elements are laid out next to each other. In the example below, there is an icon next to some text teasing the launch date which uses autolayout.
Experience the import flow for yourself using this dummy Figma design.
Importing the Figma Design into Vev
Once you've finished your prototype, you're ready to import it to Vev. This process will code your design into a web page in Vev. You don’t need to do any copy and pasting of styles, or laborious asset exports and imports — it’s all handled by Vev.
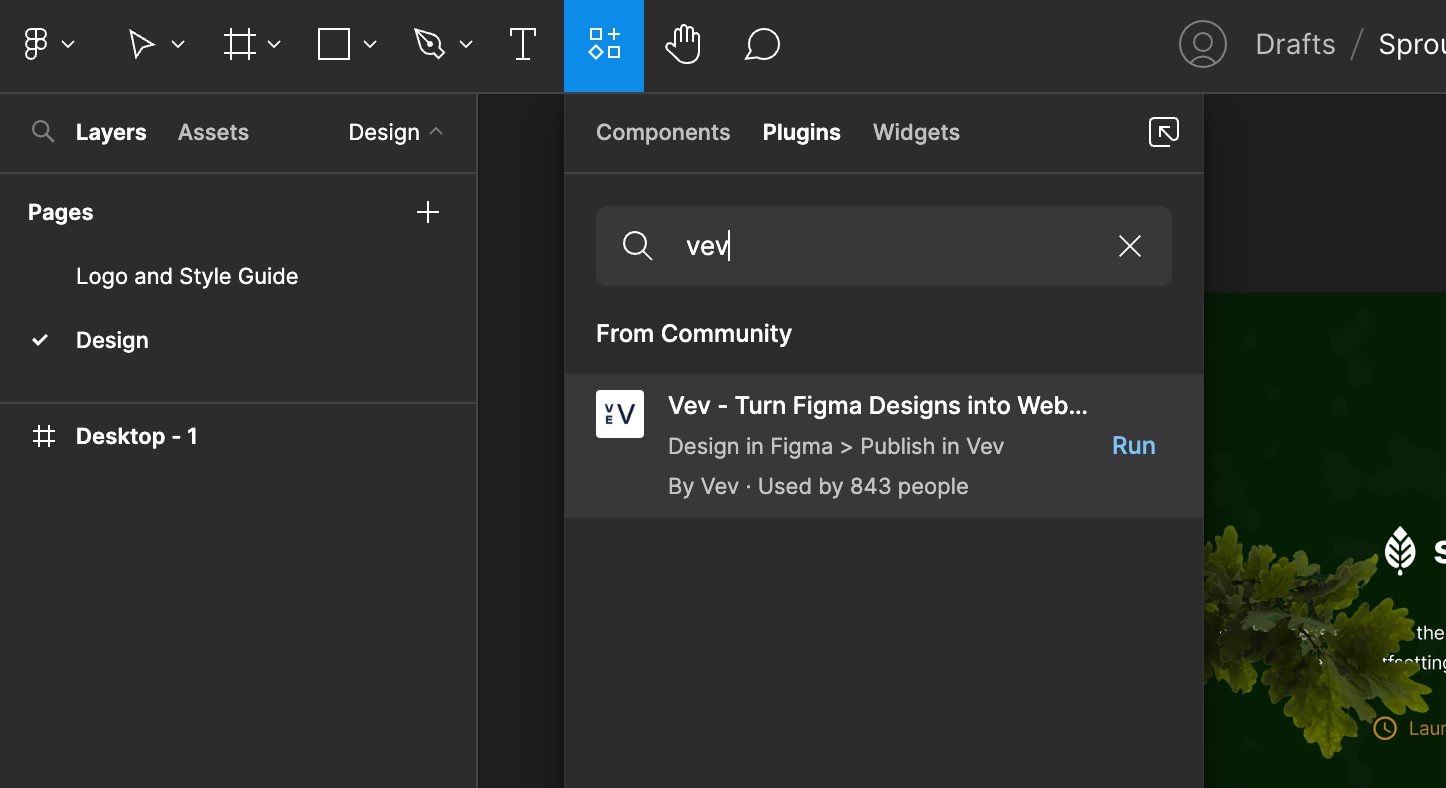
Start by running the Vev plugin in Figma (you can install it here) and selecting the frame you want to import.
You’ll then be asked to enter the link to your Figma file. Click "Export" to start the import to Vev, which normally takes a few seconds to complete. In case you've included fonts that aren't yet available in Vev, you'll be prompted to add these before your import completes.
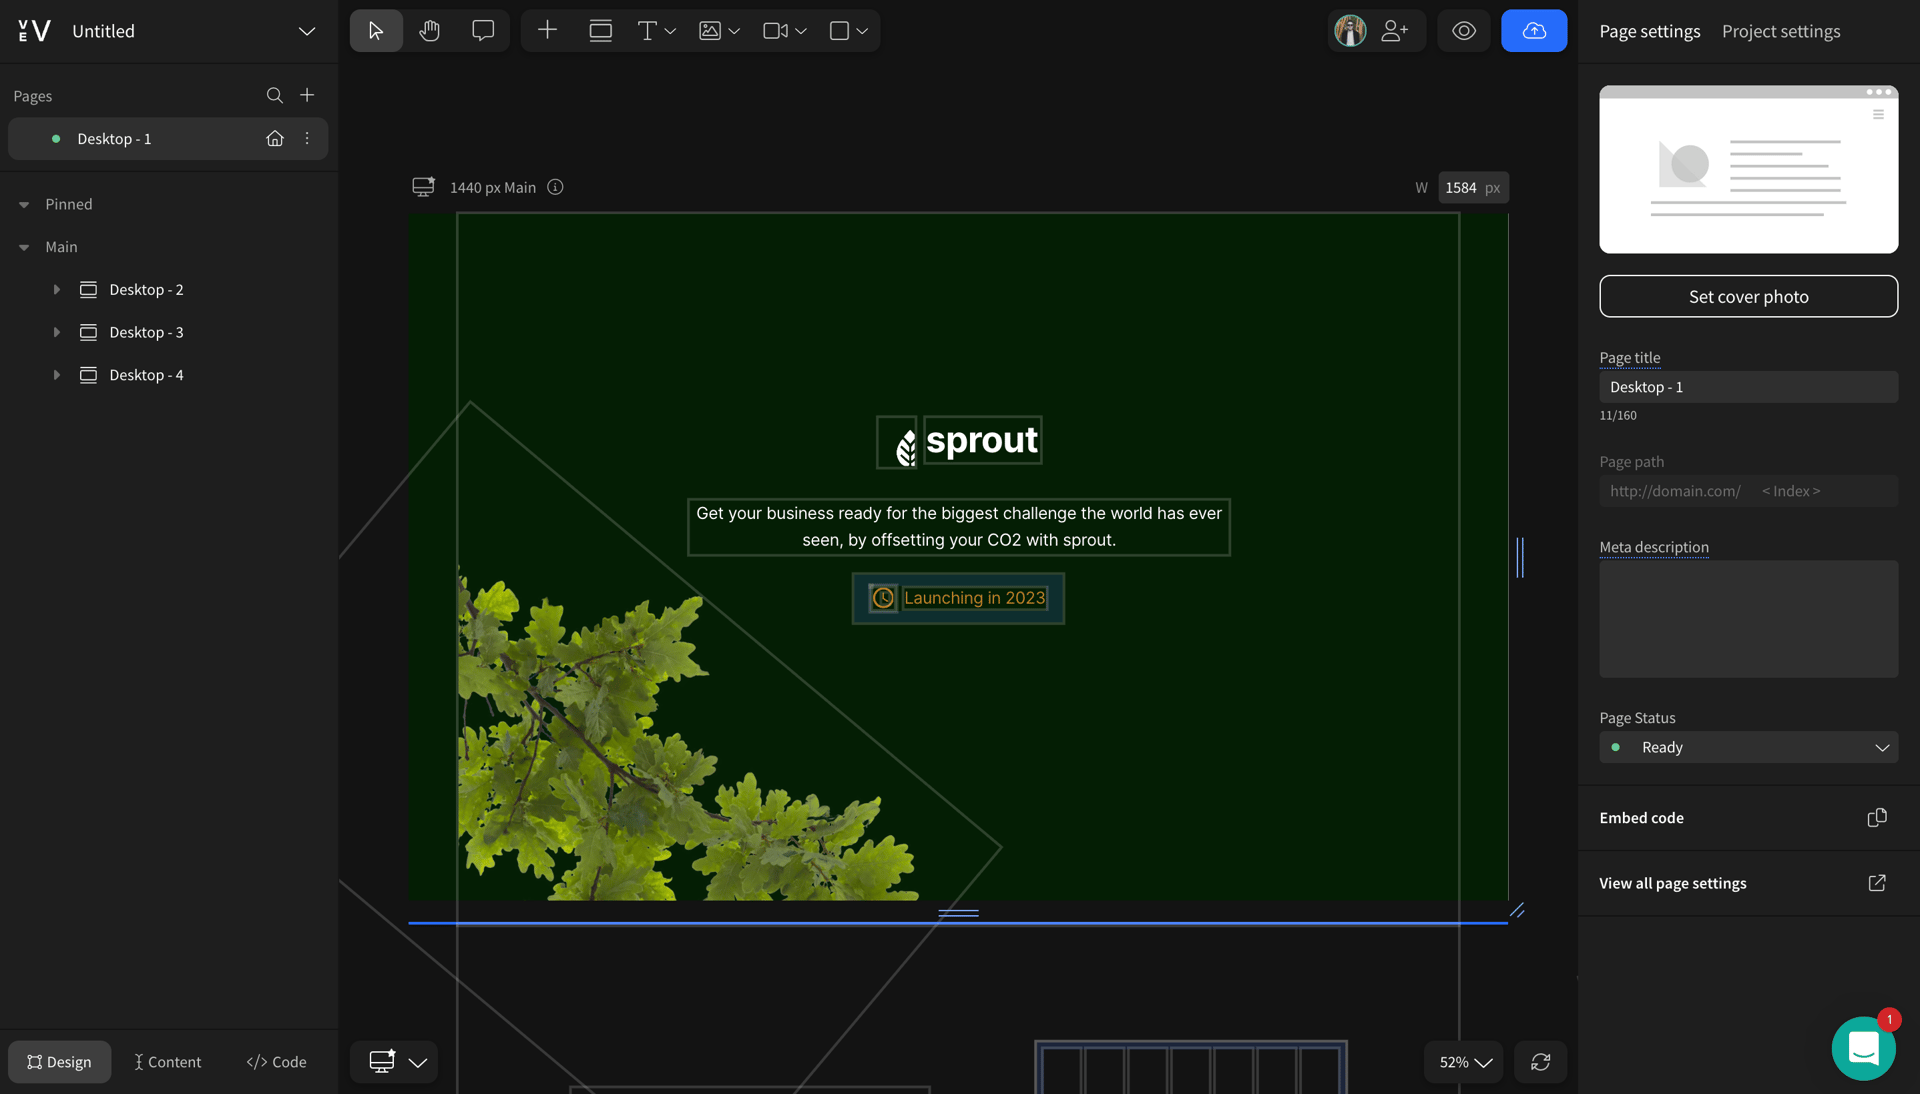
And that is it! Your Figma design has now been coded as a web page inside Vev. As you can see below, most of the design has been imported like-for-like. Vev uses a lot of the same semantics as Figma, so if you commonly use things like auto-layout then things will behave as you expect once you import your design.
Some design elements might need a tweak — for example, our tree branches which obscured the initial hero section have moved around slightly. We can reposition them visually to get complete parity with the Figma design.
From here, you can publish your design straight to the web through Vev. But, before you do that, there’s some more magic worth checking out:
- Add advanced animations and interactivity to enhance your design
- Optimize your imported design for tablet and mobile experiences
Make Your Figma Design Interactive
While prototyping in Figma, you may be thinking about certain animations you could add as you are designing, or adding interactive elements like buttons that remain static in Figma. Once your design is in Vev, you can actually make these happen without having to touch any code.
Let’s jump back into our design for Sprout to show you how easy it is to add advanced animations in Vev.
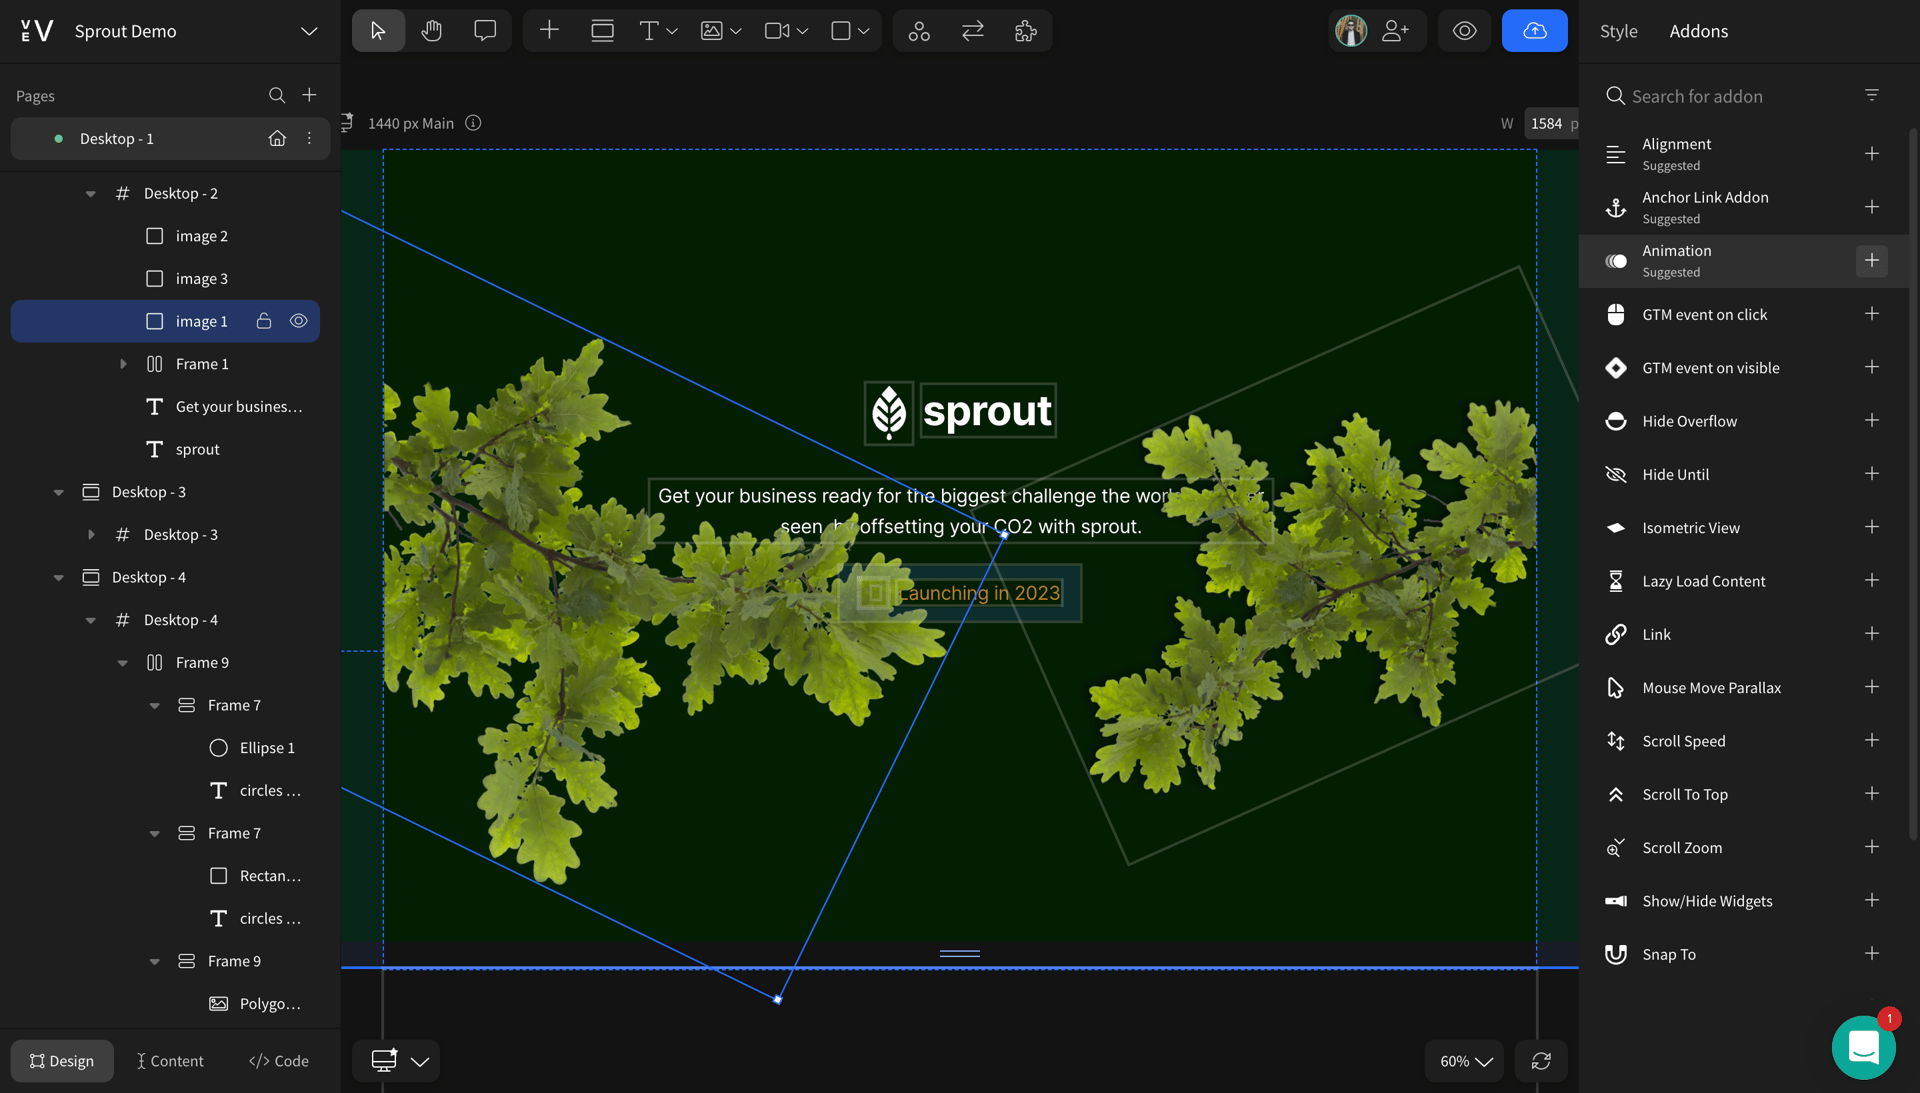
Let's create an initial load animation on the tree branches, so that they uncover the hero. We just need to select the image of the branches and apply an "Animation add-on" to it from the right-hand style panel.
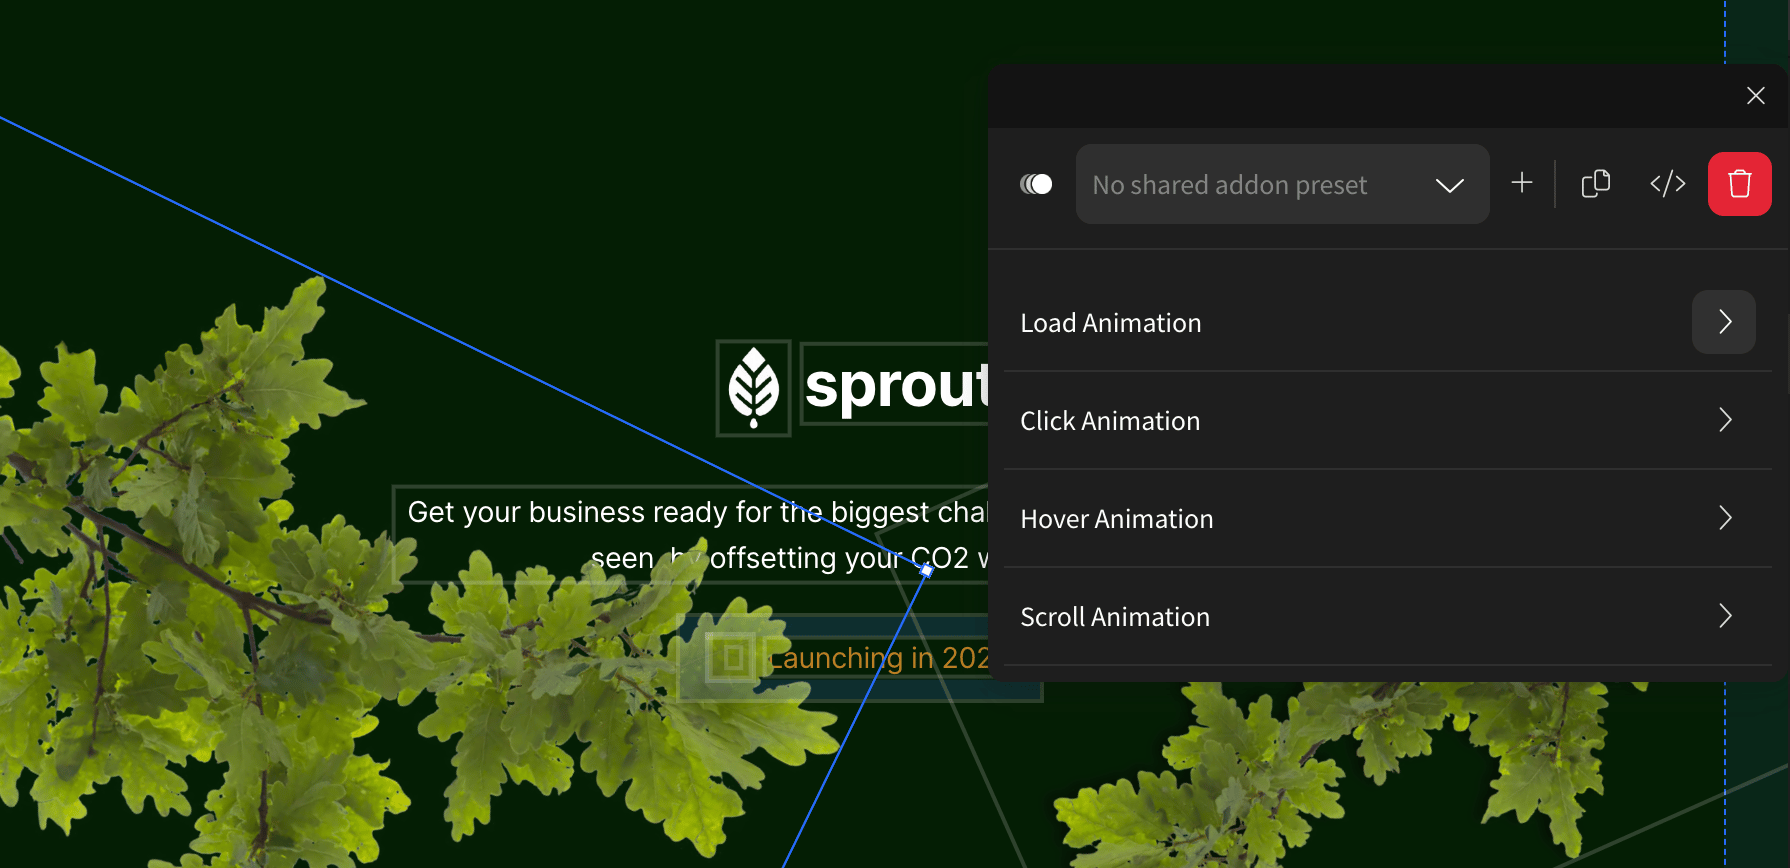
We’ll select the "Load Animation" option here so that it’s triggered as soon as the user lands on the page.
Vev comes pre-loaded with a bunch of animation types to choose from, but for this custom animation we’ll use the "Custom" option to make our visualization unique. For the purpose of this animation, we will use the "Back" easing function, and make it ease in and out. This will make the branch bend down, gently lift, and then slightly settle down again — creating the sense our branches are being lightly tussled by the wind.
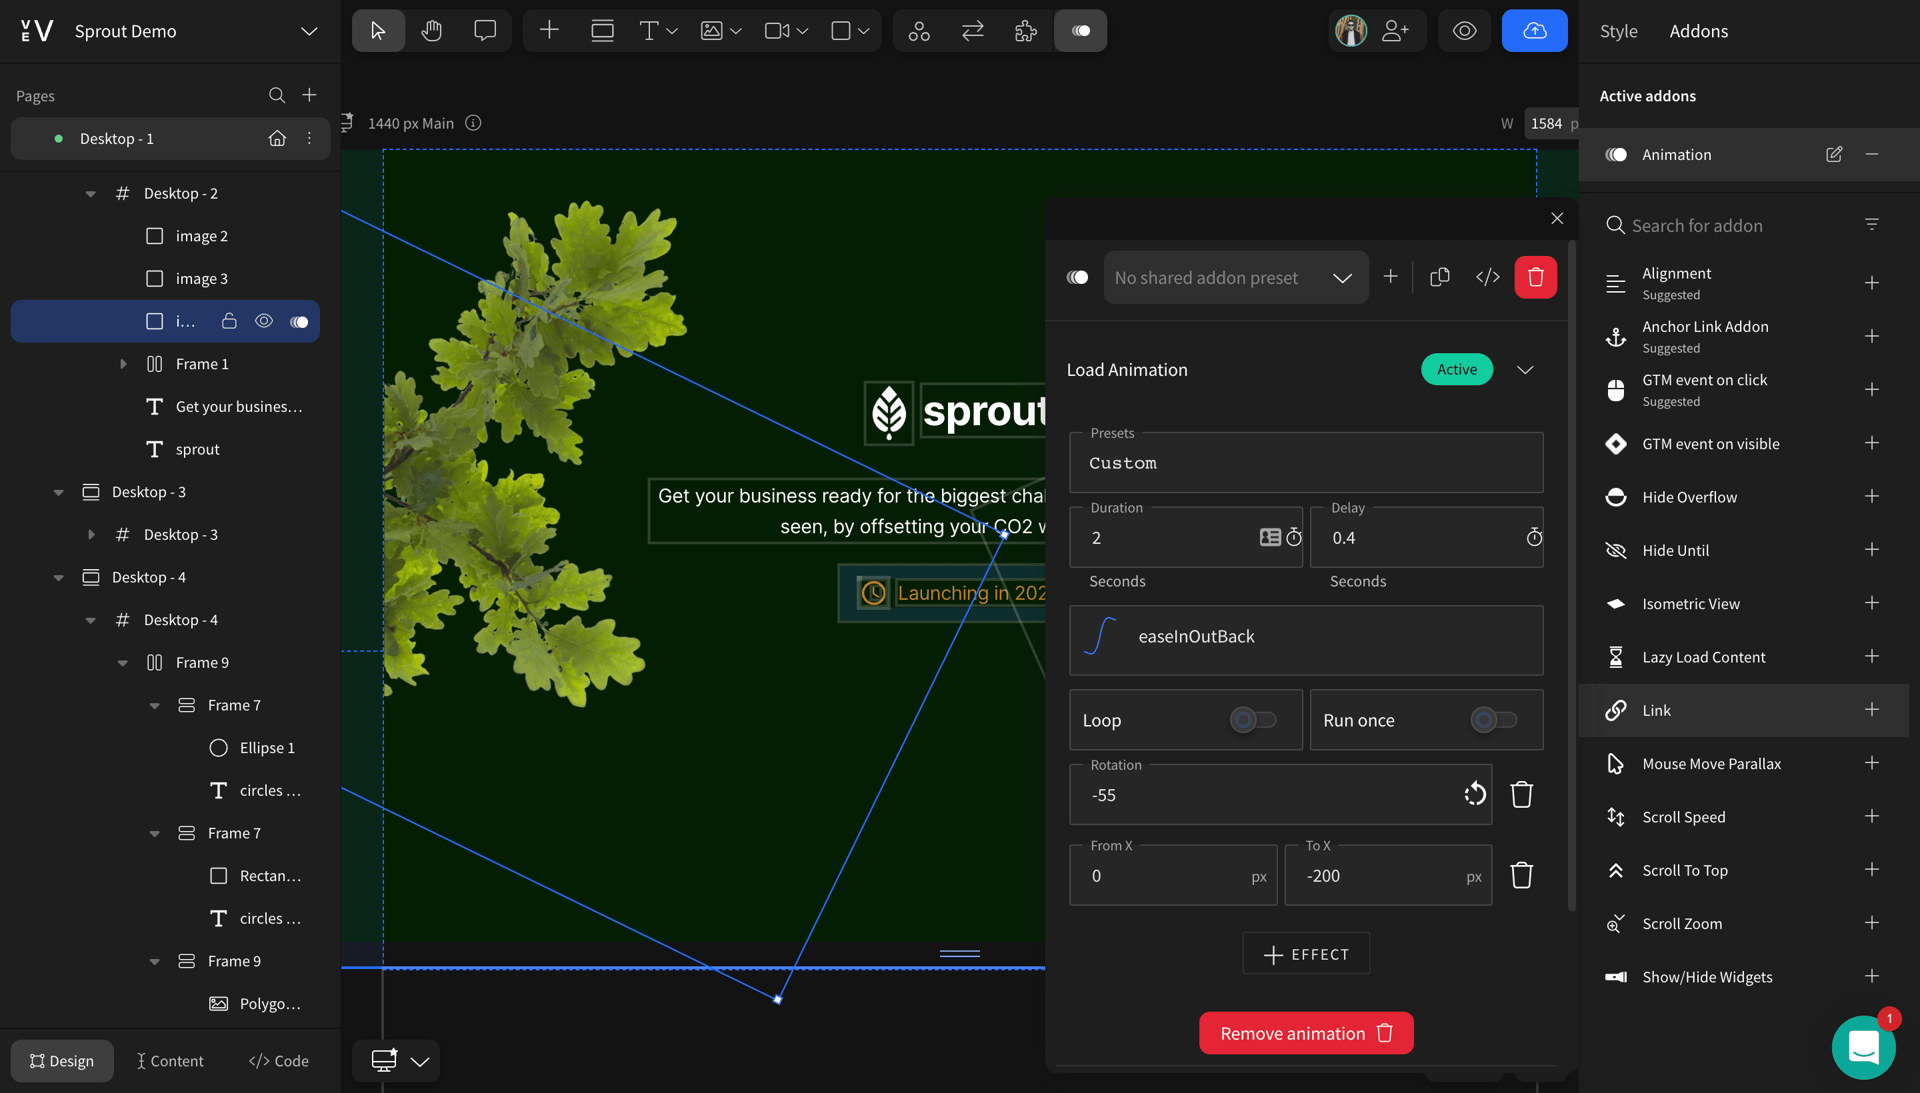
Finally, we’ll customize the types of changes we want to make to the element when we animate it. We can choose to impact multiple properties by clicking the "+ Effect" button. In this animation we want the branch to rotate away from the text and move horizontally backwards.
Hit "Preview" and you’ll see that the branch now lifts away from the text on the left side. We can replicate a similar animation for the branch on the right to complete the look.
You can easily add other load-, hover-, click-, and scroll-triggered animations to bring your design to life using Vev's pre-built animation add-ons, so have a play around!
Take a peek at the final web page.
Make Your Figma Design Responsive
It’s important to ensure your design is functional across all viewpoints. Luckily, making designs responsive in Vev is a breeze.
In the Design Editor, you can use the breakpoint selector in the bottom left to toggle between desktop (which we’ve already designed for), tablet and mobile — or simply drag the handles of your canvas to resize it. Designs are inherited from larger breakpoints downwards. This means, if you make a change on a tablet, the change will also impact mobile, for example.
After a few tweaks, the designs will be responsive across all viewports. This includes making the animations work on smaller screens too.
Publish Your Project to the Web
Now that the design is interactive, responsive, and looking good, we can share it with the world.
Vev has a few options for publishing your project:
- Publish it to our servers with a staging link (you can check out our design here).
- Link a custom domain to Vev to publish your site to your own domain.
- Embed your design wherever you currently host your website — for example, in an existing CMS like WordPress or Contentful.
If you want to embed your design, you can simply copy the embed code and paste it into any HTML file or as an HTML embed in another tool. It’s a very simple embed script, for example here’s ours:
1<script src="https://embed.vev.page/v1/DSFbltK-H9/pSCRQ9ECx0l"></script>Voila! You have successfully mastered the Vev shortcut between prototyping in Figma and publishing on the web. All that's left is to show off your work to the world...
Turn your Figma Design into a Website with No-Code
Discover the designer's shortcut to the web. Our Vev Plugin takes care of all layout, alignment, styles, and auto-layout components—so you can just focus on making great websites. Once coded in Vev, easily add interactivity and publish your site anywhere on the web when you’re ready.
Want More Inspo?
Get our monthly newsletter straight to your inbox.
You can always unsubscribe at any time.
Privacy Policy