
What is a Web Design Workflow? A Complete Guide
February 27, 2024
Words by Selene Nelson
“Design is not just what it looks and feels like. Design is how it works.”
These are the words of Steve Jobs, and though it’s been many years since he said it, it’s just as true as it ever was. It’s particularly relevant when it comes to web design – because while good-looking visuals and unique style are important, they’re only a small part of what web design entails.
It takes a lot of planning and preparation to build a beautiful and functional website, and as any web designer knows, you need to think about much more than just design and development. Any web designer worth their salt needs to consider all the stages, steps, actions, and tasks that are part of the web design process – from the initial planning right through to execution and launch.
This is where a web design workflow comes in. You can have an abundance of unique ideas and a flair for artistic vision, but if you don’t know how to create a web design workflow that ensures the process goes smoothly and deadlines are hit, you’ll never reach your full potential.


What is a web design workflow?
A web design workflow is, in short, the process of developing a website. It’s the series of steps you take to get from start to finish. The whole point of the workflow is to make the design process as simple, streamlined, and stress-free as possible, and that involves ensuring all stages of the web design process are structured.
The main stages of web design workflow can be split into three key steps:
1 Research and planning
The first thing any web designer needs to do is gather information about the company they’re designing the website for, the purpose of the site, the target audience, industry, and competition. Once they’re clued up, the designer then starts planning out the website, from the UX concept and site structure to visualizing the design. At this stage, most designers will draw wireframes so they know how each web page will look, and will decide on which CMS system to use (unless they’re custom coding it).
2 Execution and testing
For many web designers, this is the fun part – the stage when the site begins to come to life. During this phase, the content, graphics, and UX strategy will be created, ensuring that the site doesn’t only look great, but also has a fully responsive design. Once the basic framework of the site is ready, there’ll be several rounds of testing before the site can be considered for launch. Content will need to be added and different functions tested to make sure there are no errors or bugs. If everyone’s happy, the site can begin the launch process.
3 Launch and post-launch
Once everything’s been signed off, it’s time for the official launch. This is the point when the website becomes accessible to everyone, so once you’ve had more feedback after people have interacted with the site, you may want to make further changes. Post-launch, it's important to monitor the site’s performance and make sure everything is working the way it’s supposed to, so you may need to provide ongoing support and make further improvements along the way.
So that, in short, is what a web design workflow is all about. Of course, each of these phases involves many other steps, tasks, and stages, and because web design is almost always a collaborative process, it’s important to make sure everyone involved is clear about expectations and what their roles and responsibilities are.
Because design is meant to be creative, it might initially feel unnatural to be so regimented with the process. But ensuring you have a thorough web design workflow can make the difference between success and failure – and at the very least, it can make your life much easier, and far less stressful.
Why is a web design workflow so important?
It’s hard to overstate the importance of having a good-looking, user-friendly website. In our digital-age, having a memorable website is one of the pillars of a successful business. Studies show that up to 98% of customers don’t make a purchase during their first visit to a brand website – so if you want them to come back, you need to make sure your site is well-structured, well-designed, and contains all the key info.
67
% of consumers don't make a purchase on their first visit to a website
A good web design workflow is basically your framework for achieving this; it’s your pathway to success. So what are some of the biggest benefits of web design workflow?
A web design workflow helps you stay on track
Once you’ve created a web design workflow template, you’ll be able to use it time and again – and because it helps you understand how long different phases and individual tasks take, it’ll help you stay on track and create accurate timelines.
Knowing how long things will take won’t only help you stay organized, it’ll also improve communication with your clients, as you’ll be able to be clear about your timeline, when each stage will be completed, and when the clients can expect to hear from you next. Being transparent goes a seriously long way in building trust and lasting working relationships.
A web design workflow saves you time and money
No matter what project you’re working on, time is a scarce resource – but by creating a web design workflow, you’re drawing out a plan that will help you detect and deal with any potential issues or bottlenecks before they pose a real problem.
Plus, when you create a web design workflow, you map out all the different stages in the most efficient way. Knowing exactly what’s coming next, and that you’re working on things in the right order, can help boost productivity – not only in terms of individual team members, but in cross-functional collaboration, too.
A web design workflow reduces stress
Having a web design workflow in place removes the stress of project-management, as each step is carefully mapped out and easy to follow. It’s understandable to feel overwhelmed when you have multiple tasks in front of you, but being able to work methodically through your plan is a really effective way to combat stress.
Plus, because you’re better able to manage expectations, you don’t have to worry about frustrated clients who feel out of the loop – and you can also create extra time for things like feedback, or errors, or anything else that might delay the launch of the site.
A web design workflow delivers better results and profits
And finally, because it saves you time, helps you stay on track, and reduces stress, a web design workflow also pretty much guarantees better results. Being able to focus on the task in hand without multiple other things vying for your attention means the work you produce will be of a higher quality.
With improved productivity and better results – as well as fewer mistakes or delays – you’ll be able to work faster and smarter. This means you’ll be able to take on more projects, which will increase your profit margins.
Web design workflow tools
To get the most out of your web design workflow and ensure it’s as efficient as possible, you’ll want to use the right tools. There are many tools that can help manage different stages of a web design workflow, from project management and collaboration tools to tools that help with testing, reviewing content, and creating sitemaps.
Here are some of the best web design workflow tools you might want to check out.
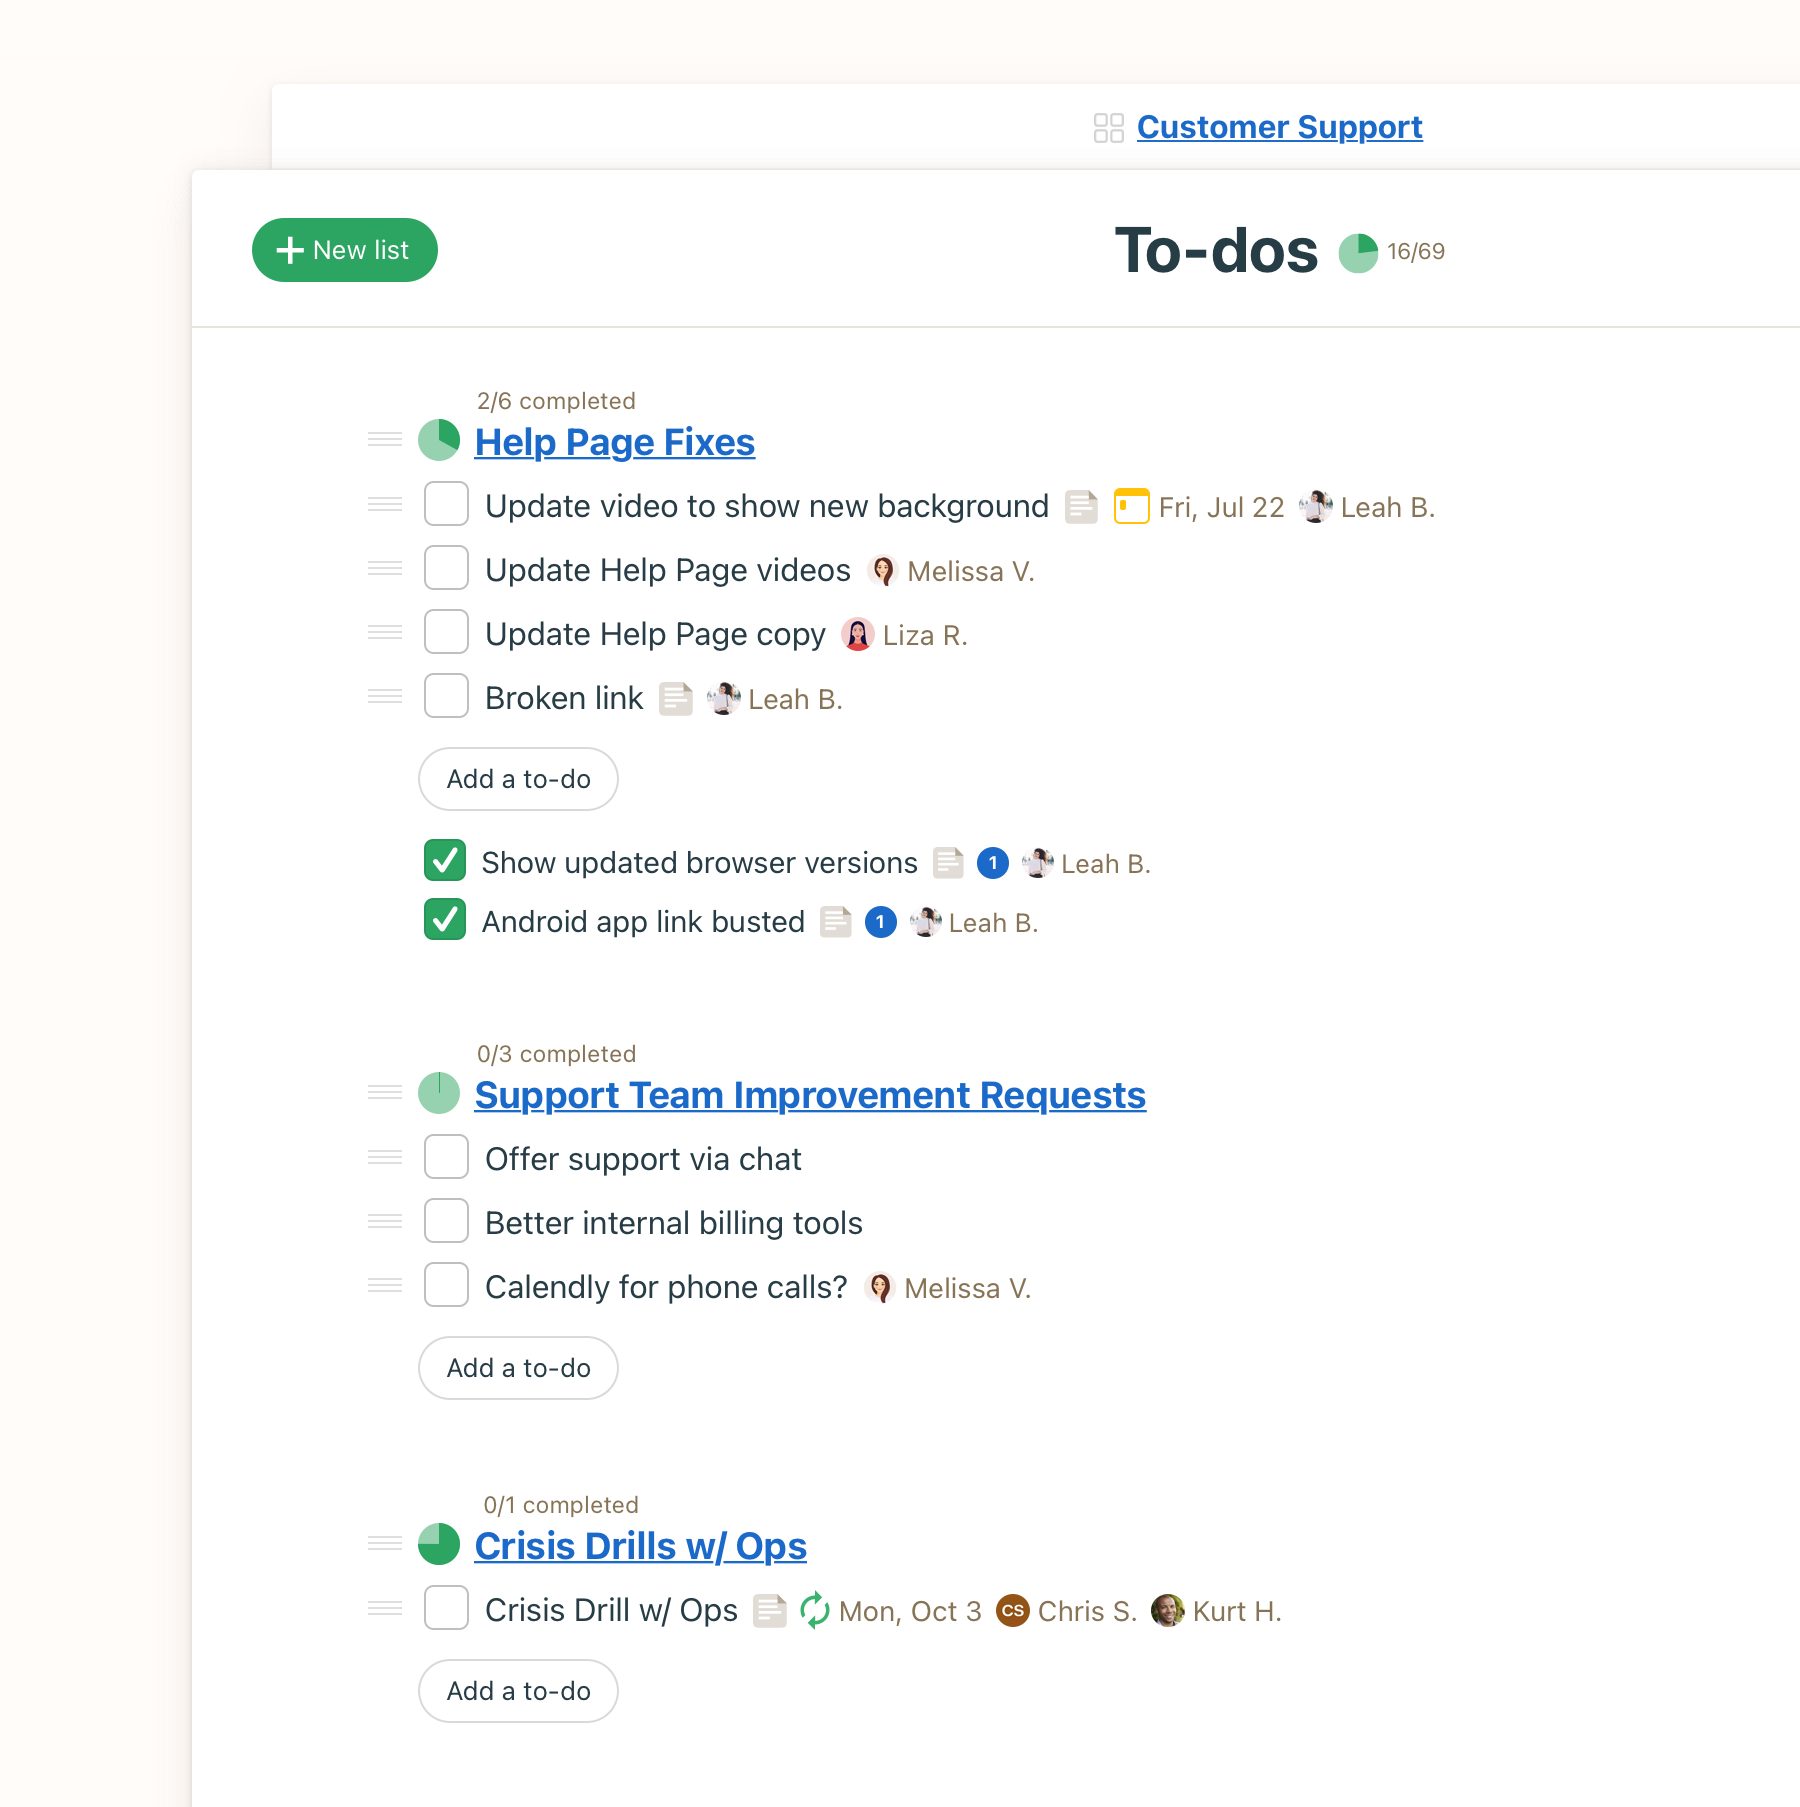
Basecamp
If you’re unsure how to kick your web design workflow off, Basecamp is a great place to start. This excellent tool simplifies and streamlines every aspect of project management so everything is on one single platform – from communication and scheduling to file-sharing – and makes communication and collaboration a breeze.
Staying organized and keeping track of work, progress, deadlines, and responsibilities is easy with the to-do feature, and the straightforward, one-page dashboard for all projects makes it easy to see assignments and schedules. If you’re looking for help with the planning and implementation phase, Basecamp will deliver.
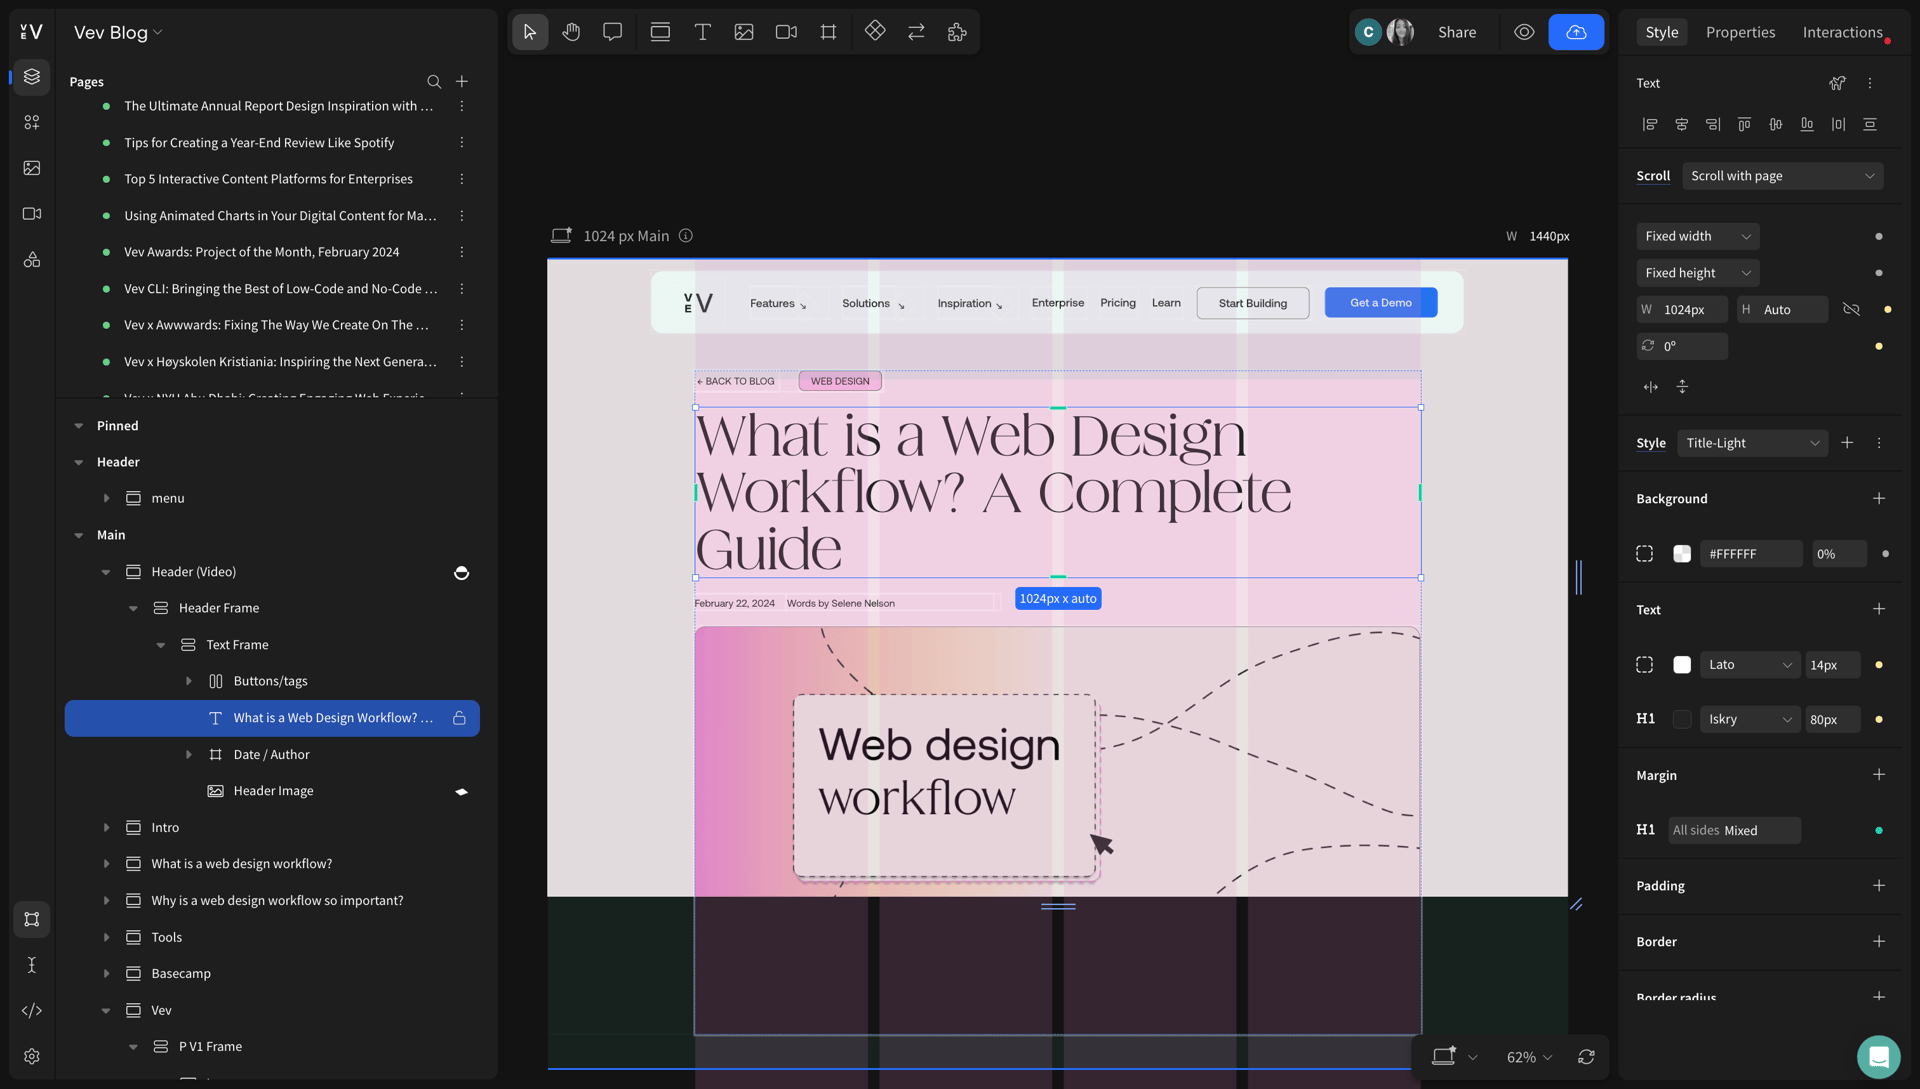
Vev
For prototyping and creating, you can’t beat Vev – and we’re really not just saying that! If you’re looking for total creative freedom, Vev’s prebuilt animations and features will instantly take your web design to the next level, and its pre-made, customizable components allow you to build beautiful sites and memorable content with speed and adaptability.
Having so many animations and interactions at your fingertips means you can create the precise look you want, and it's never been easier to create a fully-responsive design. With a powerful drag-and-drop visual editor and free-roaming canvas, Vev ensures the design process will be smooth all the way – from concept to launch.
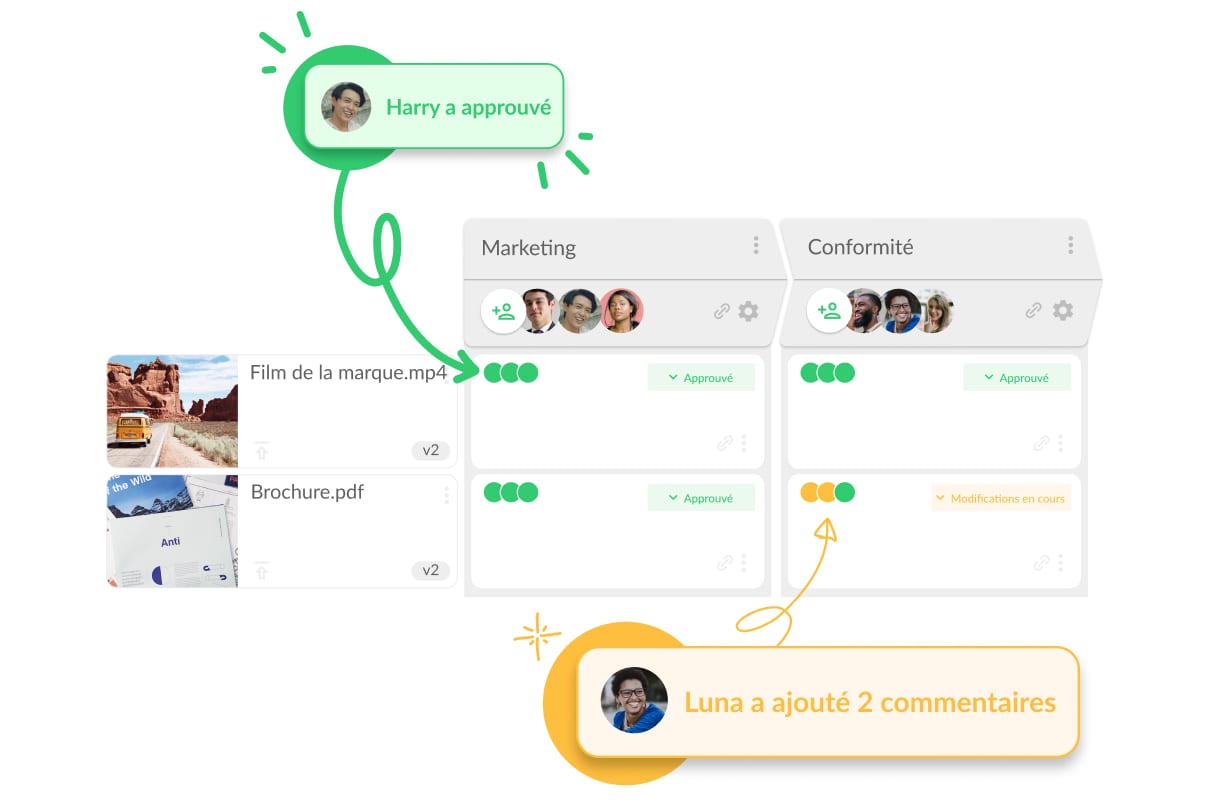
Filestage
To streamline the content review and approval period, Filestage can be a major help. Its user-friendly and easy-to-set-up interface makes organizing and scheduling the feedback and approval of work simple, and you can see which files are good to go – and which still need reviewing – in a single glance.
Because everything is in one centralized location, you’ll get a transparent view of all files and feedback. Other features include real-time comments, due-date setting, versioning control, and the ability to assign permissions based on role. Setting up a review and approval process only takes minutes, and by speeding up this process, you'll be more likely to avoid unnecessary delays.
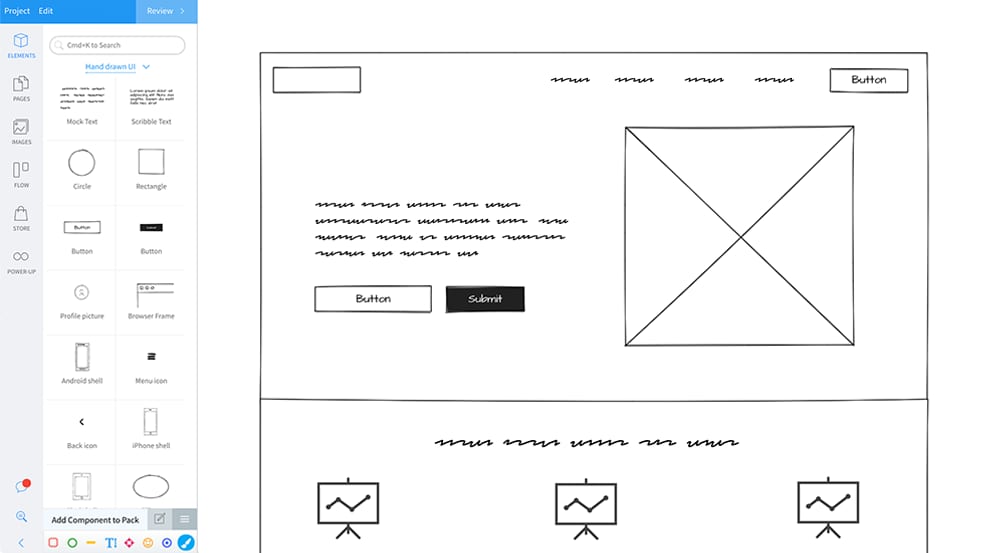
Mockflow
One crucial part of web design is creating wireframes, which are rudimentary sketches that show how each page will be laid out. You’ll usually use placeholder content so you can see how everything will fit together, and while you can create your own wireframes, tools like MockFlow can make it that bit easier.
MockFlow is made for visualizing UI ideas, and you can select styles using its wireframe libraries. Aside from the fact that it provides an intuitive and powerful editor for brainstorming UI, Mockflow also makes it easy to bring design teams together, as it has built-in team chat, video conference, and live presentation modes too.
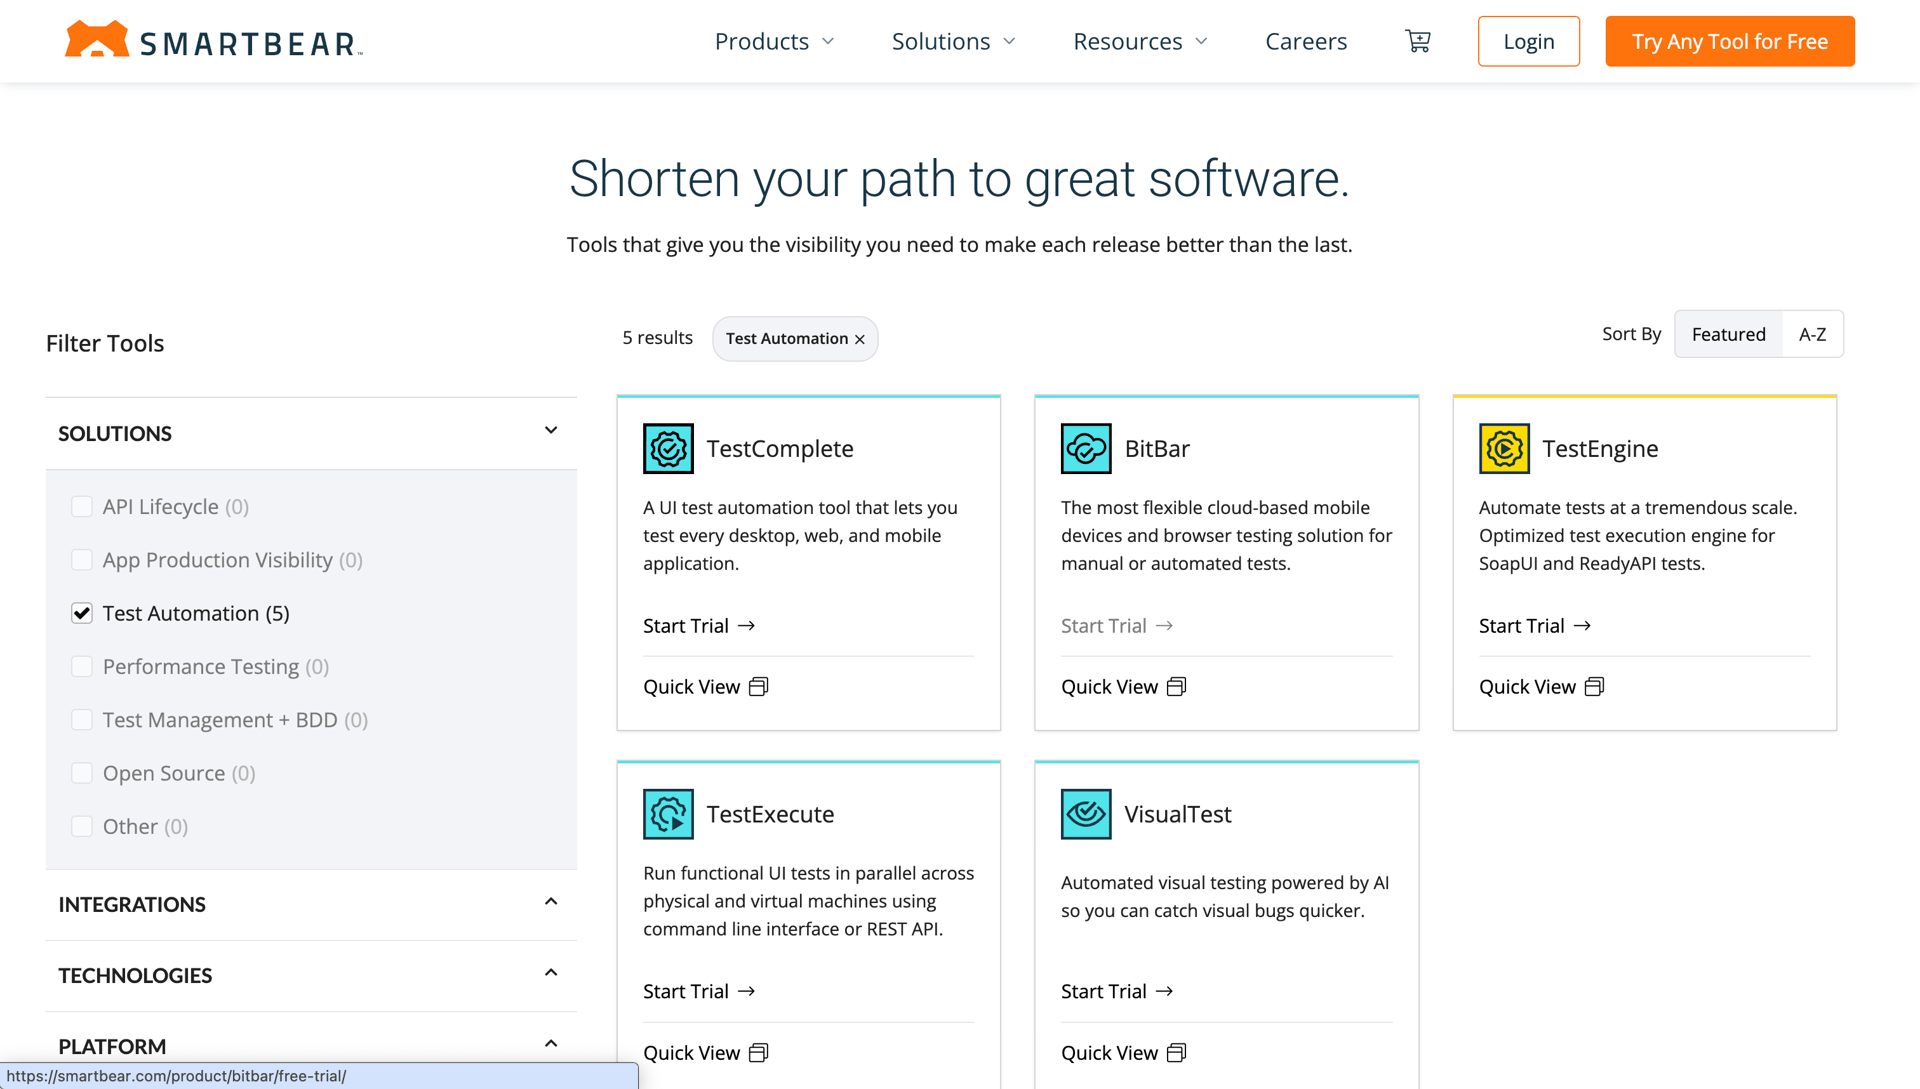
SmartBear
Testing should always be a super important part of a web design workflow. There are two main types of testing: technical, which checks whether your site loads quickly, whether the pages are working properly, or whether there are any broken links; and usability, which checks whether your site is easy for users to navigate.
If you only test your website manually, there’s a high chance you’ll miss things, whether that’s mistakes within the content or bugs. Tools like SmartBear make testing faster, easier and more accurate, and by establishing a QA process, you’ll reduce the time you need to spend on it. Knowing that your site launch will be successful can significantly reduce stress, too!
How to create a web design workflow
We might be clear about the benefits of a web design workflow, but actually sitting down to create a template can be a daunting experience. There are many different stages of a web design workflow, and processes can vary greatly depending on how simple or complex the website you’re building is. Whether you’re working as part of a team or doing the whole thing yourself makes a huge difference, too.
Having said that, we have created a helpful high-level check list that provides the foundation for your web design workflow, and allows you to work cohesively and with structure. These web design workflow steps will get you started, but make sure to personalize it to your own needs.
1.Define goals and objectives
The first thing you need to do is ensure you’re clear about project goals, objectives, timelines, and outcomes. Objectives will vary depending on the type of website you’re building: the aim might be to sell products, attract new visitors to the blog, or boost brand awareness. You also need to know who the target audience is.
To ensure you’re clued up before you begin, you’ll obviously need to speak with the client. The onboarding process should cover things like goals, expectations, timelines, and outcomes, and if you’re unable to meet in person, a video call should suffice. This is the stage where you should ensure you have everything you need to start, whether that's assets and logos, content briefs, or company information.
2. Plan out the site structure
The next stage of creating a web design workflow template is to outline the structure of the website – and you do this by creating a sitemap. Before you begin this in earnest, it’s a good idea to do some research by checking out competitor sites and looking at industry best practices. Even if you have a really unique idea, it’s always helpful to find additional inspiration you can then build upon.
Then it’s time to sketch out the sitemap, which is basically a list of all the pages on the website, and serves as a visual presentation of how the site will look. A sitemap contains info about your pages and files, and because it makes it easier for your site to be crawled, it can actually help boost SEO, too. So, it’s a crucial step!
Once you’ve built your sitemap, the next stage is to create a wireframe of the website. A wireframe is the first visual representation of how your site will actually look, and you’ll use placeholder content to get an idea of how each page will be laid out. However, to avoid getting distracted by irrelevant visual elements at this stage, the sketches will be very basic.
3. Create the content
The next stage is the content creation process, and what happens here will depend on whether you’re getting the content from the client or a third-party ( assuming you’re not doing it yourself). If the client is providing the content, try to get hold of it during the onboarding phase – that way, you don’t have to worry about delays.
Regardless of who’s creating the content, this stage usually involves collaboration between marketing, content, IT, and design teams. Aside from ensuring that the content aligns with the site objectives and the company’s communication strategy, you also need to consider things like SEO, so effective communication is vital here.
4. Create mockups and visual elements
Once you’ve got your content – or while the content is being created – the next stage is putting it together with the visuals. This is the execution phase, which is usually the most exciting and creative part of a web design workflow – the stage where all the visual content, be it videos, images, animations, or infographics, is created and added into the mockups.
Whether your website is static or interactive (and hopefully it’s the latter!), this is the stage where you should also implement things like logos, social media graphics, branding assets, visuals, and images. Then, if you add functionality to your mockups, they’ll be transformed into working prototypes, and the client will be able to see how the website will actually look.
5. Review and feedback
Once you’ve added visual effects and content to the site, it’s time to get feedback, and, hopefully, approval. The client will need to see what you’ve done and decide whether they want any changes. It’s vital to have clear communication at this stage, so you might want to think about getting feedback via a live walk-through on a video call, so you’re both clear, and feedback isn’t vague or miscommunicated.
There may be other people you need to get approval from too, like stakeholders and different department heads. This can be a surprisingly slow part of a web design workflow, and delays are common, so it’s helpful to think about ways you can streamline the approval process, whether that’s using specific tools or deciding early on that fewer people will be needed to give feedback.
6. Website development
After the content has been given the go-ahead, it’s time to move the site into development – and how long this takes will depend on which CMS system you’re using. The degree of coding knowledge needed varies greatly too – unless you’re using Vev, of course, which is specifically designed so you can create and launch unique web experiences without any code!
7. QA and testing
Once the content has been integrated into the website, the next step in a web design workflow is to check the website. This will include things like checking all interactive elements, fixing bugs or other technical issues, proofreading all content, checking SEO settings, and making sure that the site is mobile-friendly.
If you’re working by yourself, it’s smart to get a fresh pair of eyes to go over everything, as when you’ve been working on something for so long it’s easy to miss things.
8. Launch
The final stage of a web design workflow is launching the site! Once the site is live, you should do one more full walk-through with the client, and one final check to see that everything’s working the way it’s supposed to. After that, you can link the site to Google Analytics to collect all the important data.
Following the launch, you’ll be able to make changes if things don’t work quite the way you want, or correct any errors. This is where tracking analytics becomes really useful, as you can use it to study the behavior of visitors on your site and make any necessary improvements.
Moving forward, the website will need maintenance – though this may not be your responsibility. Smaller sites will need to factor in updates, performance monitoring, error checks, and security monitoring, while larger sites may need to think about things like new product uploads, SEO, performance optimizations, redesigns, etc.
Conclusion
As we’ve seen, building a website can be a long and complicated process, and it usually involves cross-functional collaboration during multiple different phases. While it may be easy enough for you to design a beautiful website, if you’re creating it for a client, they need to be happy for it to be considered a success.
Because there are so many things that can go wrong along the way – from bottlenecks to miscommunications – it’s essential to have a solid web design workflow in place, so you can follow a clear plan of action that allows you to turn your client’s dreams into reality.
A web design workflow won’t only benefit them, it’ll also provide huge returns for you – from saving time to boosting your profit margins. So really, it’s a win-win process.
Supercharge your web design workflow with Vev
Boutique agency or global marketing team — we've got a plan for everyone. Streamline your workflow with real-time collaboration, a visual canvas for all stages of your prototyping, design and production process, and personalized onboarding and support for your entire team.
Want More Inspo?
Get our monthly newsletter straight to your inbox.
You can always unsubscribe at any time.
Privacy Policy